SoDakStamping

SoDakStamping
Showing posts with label savvy stamps. Show all posts

Saturday, June 22, 2013

One For Two

One card for 2 challenges that is.
One for CTS#33 at
CAS(E) this Sketch
that looks like this:


and challenge CFC#106 at

that has an element going 
"over the edge"

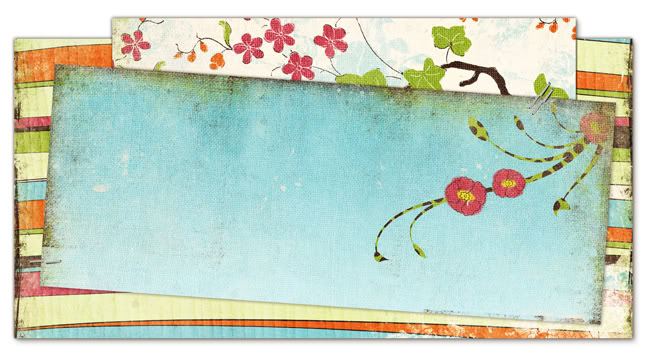
And here is my submission that hopefully
fills both challenges:

I ran the diecut flowers (by memorybox "Chloe Stem"
over one edge and put them on a panel for the CTS sketch.
The verse stamp is by savvystamps and
the pretty paper is DCWV "Blossoms & Butterflies"
A corner rounder and small tied bow to finish!
Thanks for stopping by.
Connie

Friday, February 15, 2013

CAS(E) This Sketch!!


This card was made for the current CAS(E) This Sketch! challenge.
I used an embossing folder by Tim Holtz
"Winter Berries"
colored with Copic markers
(bow was airbrushed with Copics
and no matter what color you see, it does match the papers!!)
I stamped image (memory box) twice and cut the bucket portion out
and popped it up over the flowers.
Stamped the verse by savvystamps with
Tuxedo Black by Memento.
Rounded corners with my
Creative Memories punch.
Ta Da!  Done!!
Thanks for looking.
Connie

Friday, March 25, 2011

Simple Alterations


This simple card was done by altering a piece of DP.

I liked the basic look of the floral paper, but it had
a center that was preprinted for adding
a recipe.  
I layered a blank white panel over the entire
center and stamped a floral image by Magenta.
Added a red bow and a sentiment by 
savvy stamps, layered that over some
Tim Holtz cardstock and was finished.

In keeping to the design my card ended up being 
6" square...but I like it and that is what counts.

Thanks for stopping by!

Sunday, December 5, 2010

Waterfall Card


Above is a sample of a waterfall card I made that is closed.

Below is how it looks when open:


And here are the directions:

1)  Cut one pc. of cardstock to an A-2 size (this will be only a cardfront pc.)
2)  Cut another pc of cardstock slightly smaller to layer
3)  Cut a long strip (9 inches long & 2 inches wide) for the "waterfall"  Score this strip beginning 1 " from an end and score every 3/4 ".  You will have 4 folds that will hold your 1" squares (they will be adhered only along the fold portion of your strip)
4)  I cut squares of red that were 1 inch square and layered them with white sqs.
5)  cut a strip as wide as your cardfront and 3/4 inch high (this holds your "waterfall")

6)  stamp images, color as desired and layer onto strip.  stamp image or verse on the underneath portion of your strip if desired so it appears when the strip is pulled.
7)  Attach your "holder" strip with eyelets or brads or whatever you like at the bottom...this should line up with your bottom 1" sq.
8)  Add an eyelet and fibers for the "pull cord" at the bottom edge of your long strip.

It is really not as hard as you think.
Stamps used were by Stampin' Up, Printworks,
Stampsations, Amuse, savvystamps.


Tuesday, November 30, 2010

Handmade Vellum Paper technique


Today I am going to show you how to make your own vellum papers.

Pour enough baby oil in a disposable container big enough to submerse your paper.
Lay your paper in this, making sure it gets completely covered and remove.

Put your paper on some newspapers that have paper towels on them. Put more paper
towels on top of your paper. Iron this "sandwich" until paper is fully
dry and allow to dry completely.

A piece of white paper turns into plain vellum and some background paper looks like vellum that
has been decorated. I have scanned a panel of the same paper above my card before it
was touched so you can see how it has changed.
The bees you see were stamped on the paper beneath the baby oil paper so you can
tell it turns translucent.
Stamps used were by DeNami Designs, savvy stamps and TAC.

This procedure tends to be somewhat messy, but that
has never stopped me yet!


Sunday, November 28, 2010

Oils DO Mix Together!


Oil Pastel & Baby Oil Technique

Supplies:

Oil Pastels (2 or 3 coordinating colors)
Baby Oil
Matte white cardstock
Cotton Balls
stamps & inks of choice

Directions:

1)  Scribble 2 or 3 colors of Oil Pastels on white matte cardstock

2)  Squirt some baby oil on a cotton ball & swirl pastels to blend

3)  Let dry for a few minutes and overstamp with your choice of inks & stamps

A very simple technique that yields some lovely backgrounds in just a few minutes!

My sample shows 2 pieces....the background piece I did with a soaked cotton ball & plenty of baby oil
for a more muted result.  The foreground piece (with image stamped on it) used same amount of pastels
with very little baby oil for a more vibrant outcome.

Stamp credits:  verse by savvystamps and image by Northwoods Rubber


Sunday, July 18, 2010

Thinkin' Fishie


This card was done using a pc. of shaving cream left over from 
a previous project.
I stamped the fish over the cream background.
Layered a few times and
stamped a small sentiment
and called it finished.
The fish image is by TAC and the sentiment
by savvystamps.
So what do you think?
The background reminded me of bubbles and bubbles of fish and you know how
that goes......
Connie

Friday, June 25, 2010

Hoppy Birthday

I hope my scan shows enough detail for you to see how fun this card was.
Of course I mailed it off before checking to make sure I had scanned it good.

The frog image is by TAC and the sentiment by savvy stamps.  The ribbon by Reasonable Ribbon
and the embossing folder from Provo Craft.

I stamped the images on some glossy scraps first.  The top piece was run thru my
Cuttlebug then and trimmed to fit.  The bottom piece was stamped with Versamark and clear EP before brayering dye inks over and then trimmed.

I added the sheer green ribbon and like how it turned out.
This is a great way to use up some of those scraps we all seem to amass.

Tuesday, May 11, 2010

Woven Words

There is more than meets the eye to this card.
I cut a slit on both sides of the focal image (by Hero Arts)
then stamped on a piece of paper (images by savvy stamps) the width of my slits.
I inserted this paper behind the image so it can
be pulled either way to view the message.
It is really cool how this works IRL.

**I followed the outline of my focal image for the
slits so they would be almost invisible**

Saturday, February 6, 2010

Spellbinders Flower


This card was done using Spellbinders scalloped circles dies and stamps by savvystamps & Magenta.  I cut several large circles and 2 smaller circles from pink cardstock.
My bottom flower layer is a plain large circle left flat, my next layer is the same size but folded with both valley & mountain folds for depth.  My next layer is a smaller circle with the same folds in the same places.  Basically I just divided the circles into quarters & made mountain folds at each quarter-then halfway between those folds I divided again and made valley folds around.  I used 2 circles for each layer, glueing them together for fullness.  Before I did this I punched a small circle in the center of them all and lined that up for the ribbon you see coming out the top.  The ribbon binds it together and also attaches to the bottom panel.  For added stability I set several pop dots around beneath each layer to keep it all together.
It sorta looks like a flower doesn't it?

Thursday, January 21, 2010

Alcohol Inks


This is a card I did by dripping a few drops of various colors of alcohol reinkers on top of water and laying paper over it.  The inks sit on top of the water so you get different designs every time.
I cut the paper diagonally in a swirl pattern, inked the center edges with black and replaced it on the white base card just a bit apart...after stamping my saying along the white portion.  After trimming it to fit I stamped another image (all stamps are by savvystamps) of flowers near the bottom right corner and added some small Prima flowers with tiny brads for centers.
Ta-Da!  It was finished in my eyes.  Quick, easy and with a whole lotta grab!!

Saturday, January 17, 2009

Alcohol Ink Twist Card-Technique


Guess it has been awhile since I last posted here. I finally have the holidays wrapped up...we celebrated a little later when all our family could get together. It has made me get behind on everything.
This card was done by dripping various alcohol inks onto an acetate report cover along with some blending solution & metallic mixatives (all by Adirondack), closing the cover and brayering over to blend it together....then putting 2 pcs of glossy cardstock inside with glossy sides facing out. Close the cover and brayer to transfer the inks to the cardstock. When you remove them you give a little "twist" to get a nifty pattern. Then after it had dried I ran it thru my Cuttlebug.
I put 2 pcs of matte cardstock in after removing the glossy for a "second generation" which I used on the frame and the small tag.
Images are by Hero Arts and savvystamps.
and of course those kool Nestabilities!

Wednesday, September 10, 2008

Cuttlebug Birthday


I needed a card for a first birthday and needed it now. So I turned to my Cuttlebug of course. I ran a paper thru with the number embossing folder & went over the letter one lightly with a marker to highlight it, punched the corners & layered it.
Then I added the sentiment (savvystamps) to a matching paper with a cute metal brad embellishment over the top. Done!

Now I am off to my grandson's first birthday party, card in hand!