SoDakStamping
Showing posts with label Backgrounds. Show all posts
Sunday, July 13, 2014
Thursday, July 3, 2014
Happy 4th Technique!!
Distress Paint Backgrounds
Supplies:
Several colors of Distress Paints
paper of choice (watercolor works but I used plain card stock)
heat tool
water spritzer
acrylic scrap
Directions:
1) Scribble several coordinating colors of Distress Paint onto a scrap of acrylic or other non-stick sheet.
2) Spritz with water to allow colors to run and bleed together, tipping acrylic if needed.
3) Lay card stock on top of paints and apply pressure to transfer colors; repeat if necessary.
4) Heat until dry and over stamp if desired.
My sample uses stamps by Marks Finest Papers, dies by SB. I confess that I grabbed this paper panel and smooched into my combined paints before realizing I had already stamped image in Tuxedo Black ink by Memento. I liked how it turned out so kept going. Therefore: it matters not whether you stamp first or last IMO The "sun" was sponged with Distress Inks and then stamped with Memento Tux Black ink.
Monday, December 7, 2009
No Stamps!
This quick 'n easy card came about by rolling my brayer helter-skelter to make the background and then adding a cool silhouette sticker of fish over a piece of mesh (supposed to be a fish net).
I added a few bubbles for dimension and called it good.
Saturday, June 13, 2009
Scenic Seawater

I used a background done with alcohol reinkers for this beauty. Doesn't it imitate the sea just lovely? The dancing Koi are by About Art Accents
I layered a black paper behind with one edge trimmed with a nifty border punch to dress it up.
Hope you like it and let me know by commenting!
Wednesday, February 18, 2009
Cuttlebug Background

This card uses a Cuttlebug background. I ran it thru the Swiss Dots folder and swiped lightly over the embossing with a purple inkpad to give it more depth and bring out the dots.
The image is by About Art Accents. I cut it out and layered it onto some mulberry paper that was torn to fit (more or less). The (hopefully hidden) oops in this card is the mulberry paper got stuck when I ran it thru my Xyron and sort of got whacked out of shape....
I had fun doing this simple, yet striking, card. Hope you like it.
Sunday, November 30, 2008
Word Backgrounds

This is a "need-to-make" card. My newest grandchild is getting baptized next week and I had to make a card for the little one right? I kept it sort of simple so the word background stood out.
I made the word background on this card from a website called Wordle You type in a bunch of words and it rearranges them into a cool background. The possibilities are endless and it's so much fun!
My one stamp used is by Northwoods Rubber . Let me know what you think of it please.
Wednesday, October 1, 2008
Brayered Background

No special technique with this card. I was playing with my brayer and wondered how watercolor paper would turn out is all. I've seen some results that show more texture and I think maybe I used smoother paper than those as my texture does not show well.
Anyway I liked how it turned out so am putting it here to share with you all.
Stamp credits are all by I Brake For Stamps
She has some awesome images and carries a lot of different companies so check her out!!
Thursday, September 25, 2008
Watercolor Wash
Sunday, August 3, 2008
Layerless Layers

This card uses inks & masks rather than paper layers. Make a mask that is the size of the illusion of paper you want (keeping both parts). Laying the inside mask out you sponge ink or stamp around the edges first & then use the outside mask portion to fill in your inside part with inks or stamps.
Remove your mask and reposition and repeat. Do this as many times as you wish for a totally cool look!
I'll look up the stamp credits and add them later. Right now my hands are rather full and I will explain that later also.
Stamp Credits: Penny Black
Thursday, July 17, 2008
Cuttlebug Background

I've been having some problems with my scanner today. Probably due to the fact that we got hit by lightening in a t-storm last night? I DL a new driver etc, installed it and of course it's different than what I am used to using so please bear with me...
Today I am adding a card with a background done simply by running some white cardstock thru the Cuttlebug....no ink or stamps to detract from the stark simplicity of it. I stamped an image by Cowtown Stamps (actually 2 of them) and mounted that on some pink cardstock onto the Cuttlebug background. Stamped a lovely verse that goes across the bottom of the white panel (by Stampendous)...actually I stamped this BEFORE embossing it. I ran a clear ribbon across over the stamped verse and added a small flower. Simple with a WOW factor I think. What do YOU think?
Wednesday, July 16, 2008
Acrylic Meets Cuttlebug III

Here is yet another acrylic background. I promise this is my last one!
I did this one using dye reinkers and plain Elmer's Glue, smooshing it around and allowing to dry. I didn't get much color with this attempt, perhaps I used too much glue in my ratio?
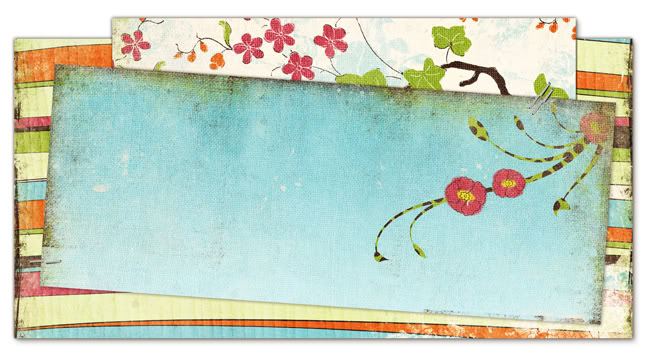
I "solved" that problem by layering the acrylic piece over a printed background paper though. The pink stripes added some color and interest I think. I smudged the verse a bit but tacked on some flowers to hide it a little.....You could say this card is a total "dupe" card I guess. What you see isn't always the whole story.
Now that I have gotten this technique out of my system, I promise this is my last one.
Verse stamp is by Penny Black
Tuesday, July 15, 2008
Acrylic Meets Cuttlebug II

I never did make it yesterday did I? Anywho this is another "Acrylic Meets Cuttlebug" done a little differently is all.
I slopped some dye reinkers on the backside of a piece of acrylic after I had run it through my Cuttlebug. Then I squirted some Future Floor Wax in the ink mix (or is that mess?) smushed it around with my finger until it looked interesting, let it dry and then mounted to a white panel & a yellow panel onto a red card.
Let me know via a reply post as to which one you like better....this one or the one from Sunday with alcohol reinkers & glue please. I think the floor wax/dye inks makes a much more vibrant outcome. I mounted both on white to keep them similar but now I can't decide....maybe that's why I did up a bunch more of these. This is addicting!!
Word stamp by PSX
Subscribe to:
Posts (Atom)


