SoDakStamping

SoDakStamping
Showing posts with label Techniques. Show all posts

Sunday, September 4, 2016

Technique: Galaxy Backgrounds


I began blending distress inks with a TH blending tool in a circular motion, then edged with black. I spritzed some water and flicked some Luna Lights inks on for stars.  
I think the white spots emulate the galaxy "look" and add lots of depth to the finished work. I added a computer generated saying and some silver fibers behind to stand in for moon rings.....not sure I like it but it's there now.
Using a different combo of ink colors will generate a whole different look!

Wednesday, August 13, 2014

Gesso Gets Gelatos Technique


Very simple: I colored stamp with Gelatos and then applied Gesso over it all, stamped and let dry. The Gesso presses out to make a sort of "frame" around the image. In the middle of a move right now and cannot find any of my supplies.....

Thursday, July 3, 2014

Happy 4th Technique!!


Distress Paint Backgrounds

Supplies:

Several colors of Distress Paints
paper of choice (watercolor works but I used plain card stock)
heat tool
water spritzer
acrylic scrap

Directions:

1)  Scribble several coordinating colors of Distress Paint onto a scrap of acrylic or other non-stick sheet.

2)  Spritz with water to allow colors to run and bleed together, tipping acrylic if needed.

3)  Lay card stock on top of paints and apply pressure to transfer colors; repeat if necessary.

4)  Heat until dry and over stamp if desired.

My sample uses stamps by Marks Finest Papers, dies by SB.  I confess that I grabbed this paper panel and smooched into my combined paints before realizing I had already stamped image in Tuxedo Black ink by Memento.  I liked how it turned out so kept going.  Therefore:  it matters not whether you stamp first or last IMO   The "sun" was sponged with Distress Inks and then stamped with Memento Tux Black ink.

Saturday, May 3, 2014

The Coneflower-a South Dakota Native

The Coneflower-a South Dakota Native


I was messing with some dies the other day and this card was born.
I cut a SB Nestie "Matting Basics" a little
off-kilter from a panel stamped with a custom stamp
given to me by a friend.
This image is dear to me as it depicts one of the
native wildflowers we have growing all over our 
state.

I trimmed the panel so some of the underlaying
color showed and popped up the outer portion for 
dimension.

Pretty sweet and simple!
I'm entering this in this week's challenge over at
as it calls for 3 colors or 3 shades of 1 color.
Thanks for stopping by.
Connie

Monday, April 7, 2014

Faux Watercolor Technique


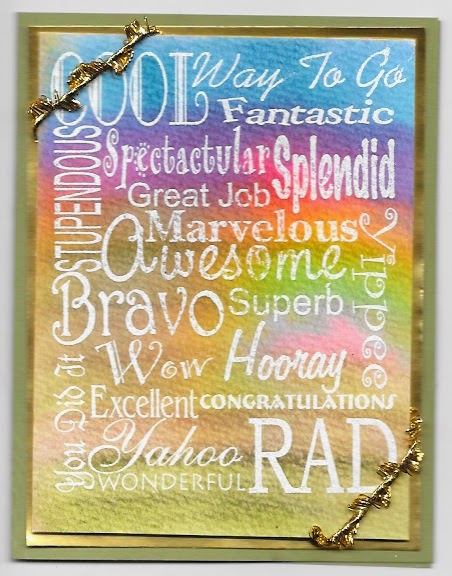
I stamped the words with versamark, heated with white EP, scribbled with Distress markers and spritzed LOTS of water. Water makes the Distress inks blend like watercolor. You get brighter color if you allow to dry naturally but you can heat to dry also.

Stamps are by My Sentiments Exactly

Friday, March 7, 2014

Ribbon Frame TECHNIQUE!

I have a cool technique for you today:

Supplies:

ribbon of choice (1/4" width is big enough yet will not overwhelm IMO)
craft knife
ruler, pencil

Directions:

1) Make light pencil marks on back of your panel in an X shape 
from corner to corner for square frame

2) Determine how big you want the frame to be and measure toward 
center from each corner to center it. Make a light mark THE WIDTH 
OF YOUR RIBBON and cut just as wide as your ribbon

3) Insert ribbon piece from back side and tie a knot before 
running ribbon back on each side. Tape ribbon pieces behind 
panel.

I used stamps by Hero Arts and color by Copics. I punched each corner but added no other decorations. For my card I measured one inch in from the corners but you could make it bigger or smaller if you like. Keeping your slit the same size as your 
ribbon ensures there will be no gaps when done.

This is how my card turned out:


Thanks for stopping by.  I would love to hear how yours came out.
Connie


Sunday, October 6, 2013

Piercing Technique!

Today's technique comes from something I saw on Pinterest that caught my eye.  I don't know who posted the original idea so cannot thank anybody in particular for this one.

"Pretty Paper Piercing Technique"

Supplies:

paper piercing tool OR hat pin OR stickpin etc.
printer that prints in mirror mode (backwards text) OR 
some fun foam scrap and stamp of choice

Directions:

1)  You can either:  print text of choice in mirror mode on printer onto card stock in light ink
OR
you can stamp onto fun foam scrap or solid rubber stamp and then onto card stock so it will
stamp in reverse.

2)  pierce the card stock along printed or stamped lines and turn paper over to use,

3)  Trim and embellish as desired.

My sample card uses a stamp by Hero Arts (it actually said "happy anniversary")
a word die by Memory Box (birthday)
designer paper by DCWV
bakers twine by Doodlebug
button from my stash
corner rounder by Creative Memories
large hatpin for piercing

*if you print in a draft mode or stamp with light colors it will not show on the reverse side of paper that you use*

Below is my simple sample:


Thanks for stopping!
Connie

Monday, September 2, 2013

Easy Technique Today!

Easy Technique!!

I was playing with a tip from my stamp group:

http://groups.yahoo.com/group/MidwestStampers/

Make-Your-Own Glitter Paper

supplies:

paper of choice
glittery embossing powder of choice
Versamark pad
embossing folder of choice

Directions:

You can either swipe the folder with versa mark before
embossing OR swipe versamark pad over embossing.
(I had better results by embossing prior to swiping)
After embossing with folder and versamarking
(is that a word??)
add some sparkly glitter and heat.
Now finish as you like for a spiffy
paper like none other!

My card:


I used:
SU! Holagram Highlights EP
folder by QuicKutz "Leaves"
Versamark Dazzle "Frost" by Tsukineko
paper by Basic Grey "indian summer"
dies by
SB "Foilage"
memorybox "Typewriter Alpha"
and NO STAMPS!

I am entering this creation over at

       CAS(E) this Sketch
Thanks for stopping!
Connie

Monday, July 29, 2013

Glitter Technique!

I have a NEW technique today!

Did you know that you can stamp (and color) on top of glitter?
Well you can and I will show you how.

Cover your paper with double stick adhesive...I used redliner tape
in strips (which gave me little lines but I added color to them instead of
beginning over...isn't that what we are supposed to do with boo-boo's?)

Cut shape if desired and then remove the top liner of your tape and
add fine art glitter, make sure to press it down for good coverage.

Now stamp image ON TOP of glitter and allow to dry for 15 minutes.

Color as you like, do not stroke the color, rather stipple so as not to
remove any glitter.

Now finish as desired.  You should result in an awesomely 
glittery showpiece!!

Below is my sample:


Can you see all the glitz this tech produces?
Ahem....you may have to look a little closer, but it is there!
I used stamps by Stampin' Up!
ef by Provo Craft
Ultra fine glitter by Art Institute
red liner tape
Memento ink
Copic markers
paper by Anchor Paper

I am entering this in the current challenge over at
where there has to be at least one number on the creation.

Wish me luck!
Connie

Friday, February 15, 2013

Sweet Pea Birthday


This sweet image is
"Little Wishes" by
Elisabeth Bell.

I embossed with a folder by
Crafts-Too "Blossom"
and sanded very lightly
to bring out the white core.
I trimmed her with a SB die
and added a sheer ribbon.

You'll find many more delightful images
by this artist and many more over at

Sweet Pea Stamps

Thanks for stopping!
Connie

Saturday, September 15, 2012

Triple Time Technique


I fell in love with this elegant yet quick card.
So much so that I want to share with you how to make your own:

Triple Time Technique
Supplies:  2" by 3 1/4" panel, 3" by 4 1/4" panel, 4" by 5 1/4" panel.
Above panels will be your lighter toned papers and below are measurements for the
darker mats for each:
2 1/4" by 3 1/2" mat, 3 1/4" by 4 1/2" mat, base of 8 1/2" by 5 1/2".
The smallest combo is the 2" by 3 1/4" paired with the 2 1/4" by 3 1/2" mat.
Next is the medium 3" by 4 1/4" panel paired with the 3 1/4" by 4 1/2" mat.
Finally the 4" by 5 1/4" panel goes over the base of 8 1/2" by 5 1/2".

When you have them all cut to size sort your panels out from the mats and adhere a small
piece of low-tack double-stick tape on the backs to put the 3 panels together without the mats.
Stamp your images all over the 3 panels allowing them to "leak over".  Don't worry if  edges seem to be missing as they will be covered later.
Separate the panels and pair the small and medium with their mats, then add fibers if you want before
putting pop dots on the largest panel and adhering so images line up with each other.

I added some hand-made bakers twine as I did not have the color I wanted to use.  I wrapped some around a ruler and ran a Copic marker along it.
I used stamps by Annette Watkins, Creative Vision, Penny Black and PSX.

You could do other shapes instead of rectangles I think.

Saturday, July 28, 2012

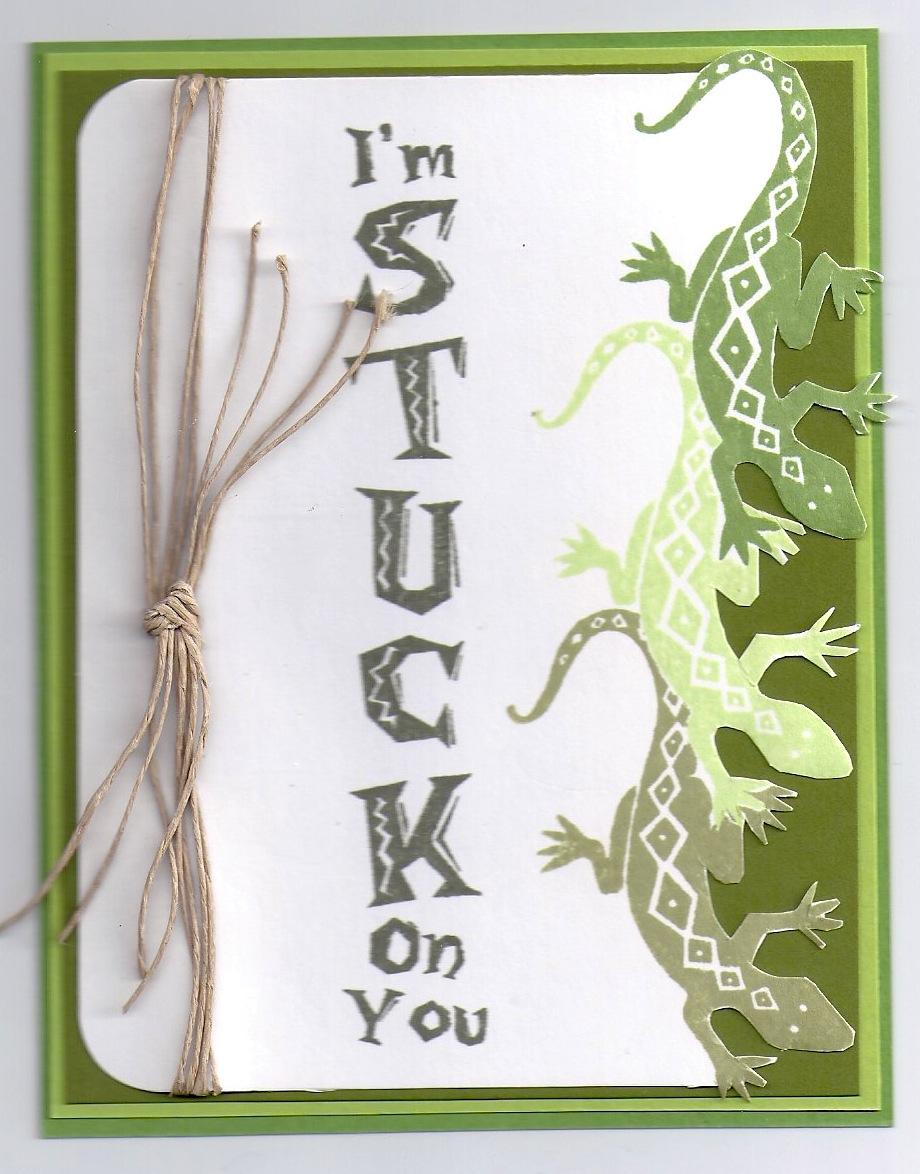
Some SAM Gecko's


Here is another 
card for you.

This one uses the 
"Masked Border" technique
from Technique Junkies.
I also used some natural hemp,
Memento inks
and some fancy cutting.

Hope you enjoy it!
Connie

Sunday, July 22, 2012

Gelatos Blending Technique

This is a quick technique lesson for you:

Supplies:

Gelatos by Faber Castell
stamps by Sweet Pea Stamps
versamark pad
black embossing powder
heat tool
white card stock
sponges or brushes
paper towels

Directions:

1) Stamp your image on white stock with Versamark ink.
2) Cover with black embossing powder and heat till melted.
3) Scribble Gelato onto plastic piece and rub sponge or brush in
to cover and apply to image.
4) Scribble another Gelato color and blend into first color. These blend
very well, very easily.

**I found that rubbing my finger on the top of the Gelato itself and then on my image worked
the best for me. Color was easily removed with a wet wipe. Applying Gelato directly resulted
in lines of color where I didn't want them and was hard to blend in-this was my experience.**

You could do this with black card stock and white ep or white stock and clear ep….the
possibilities are endless! I only have gold, silver, black and white for colors so my test was limited.
I blended silver in the center of my verse with gold on the outer parts and a little black along the edges
for contrast.

My sample uses stamps by Sweet Pea Stamps, dp by 7gypsies "nottinghill", corner die by memory box
"Macarena Corner", label dies by Spellbinders "Ornate Artisan". The flowers are by Wilton with Copic color
airbrushed on the edges.
I hope you have enjoyed your lesson.  Below is a close-up of the blending itself:


Friday, June 8, 2012

Un-Butterfly


This was a quick 'n simple card to do.  I did it for the Negative challenge over at 
SCS using a TAC verse stamp and a butterfly die by
Cheery Lynn Designs.
BUT I used the reverse or negative portion of the diecut!!

I filled in the space with some paper scraps cut with 
an EK rickrack punch.
The embossed border was done with my 
ScorPal and I added some small
roses for the body.

I had fun doing this card and can
imagine the possibilities for
various punches and dies.
Connie

Thursday, March 1, 2012

Faux Embossing TECHNIQUE


I call this
"Faux Embossing"

Simply cutting strips of same colored paper and
layering on your same color base gives you
a look of embossing without the stylus or the dies.

"Oohlala" stamp is by Stamp A Mania 
and buttons are by "Dress It Up"
Edger punch by Martha Stewart
with a Viva Decor "dot" added.

Thanks for stopping by.
Connie

Friday, August 5, 2011


**TECHNIQUE**

Inlaid Embossing Technique


Supplies:

stamps by Marks Finest Papers (from a new set being introduced next week)
Geo Die of choice (I used a new Mini Geo Die by Pop Ups
Inks:  Distress Ink by Ranger "Weathered Wood" and Vintage also by Ranger "Java Fizz"
grosgrain brown ribbon unknown
papers by 7 Gypsies "Nottinghill"
Sizzix embossing folder "Flourish"
Metallic Dot by Craft Essentials
flower by Brides (from cake aisle at Michaels)
this was airbrushed with Copic marker E33

Directions:
1)  Cut Geo Die with die cutting machine and fold, attach to paper

2)  Run entire piece through embossing folder

3)  Highlight with inkpad run lightly over high spots and adhere to cardfront

4)  Finish as desired

*this gives so much dimension and looks awesome IRL*

Thanks for stopping by!
Connie

Thursday, July 7, 2011

Mark's Finest Papers PLUS TECHNIQUE!!


Faux Fabric Technique

Supplies:

Stamps by Mark’s Finest Papers "Hello Sunshine"
Spellbinders dies:  standard circles small & large
Heidi Swapp tape "Grunge Stripes"
dp by Basic Grey "Indian Summer"
Copic markers
Heidi Swapp edge distresser
Cuttlebug embossing folder 

Directions:

1)  Stamp & color image

2)  Trim as desired and distress edges (roll if more dimension is wanted)

3)  Dry emboss image with embossing folder

4)  Finish as desired

**This gives a look of fabric with the frayed edges and embossing**

Saturday, June 4, 2011

MFP Just Dandy with TECHNIQUE!


This card features a TECHNIQUE!
I call it the Upside-Down Stamping Technique.

Using a symmetrical clear cling stamp, place it on an acrylic block
so the image side is facing the block and the cling or solid side is up.
Ink the solid side with a light color and stamp on your paper.
Wash the stamp thoroughly and dry, then turn it around and
mount on the block the normal way...the solid side to the block and the image side to you.

Now ink the stamp again, with a slighter darker color ink in same color family as used before.
Position it as close as possible to the shape you just stamped and stamp again.
That is all there is too this. Look closely at my sample and you will see a slightly lighter color
in the same shape as my image (butterfly by Mark's Finest Papers).

Symmetrical works best to end up with an exact shadow shape, although
some odd shapes give good results also.
Let me know how this turns out for you?

I also want to remind you of the upcoming BLOG HOP featuring
4 new stamp sets being unveiled by
Mark's Finest Papers beginning
Tuesday June 7th!!
These are awesome images so please plan to
check my blog Tuesday thru Friday.

Connie

Friday, March 4, 2011

Alcohol Ink Faux Bleach Technique w Sneak PEEK!

Today I am offering both a technique and a sneak peek!

The peek is for a new stamp set to be introduced next
week by Mark's Finest Papers titled
"Just Dandy"
and the technique is called
Alcohol Ink Faux Bleach.


Supplies: Alcohol re-inkers (2 or 3 colors) Optional: Alcohol ink blending solution Ink applicator w/felt Versamark pad Clear embossing powder Heat tool Iron Glossy cardstock Paper towels White cardstock
Stamps of choice Directions: 1) Stamp image on glossy stock with Versamark and emboss with clear embossing powder, heat set. 2) Apply alcohol re-inkers and blending solution to felt pad on applicator tool and dab over glossy. 3) Lay onto paper towel with piece of white paper on top and iron until embossing melts onto paper. 4) Buff image with paper towel to remove all traces of embossing powder.

5) Trim, mat and embellish as desired. My sample uses stamps by Mark's Finest Papers (a sneak PEEK from a new set being introduced next week titled "Just Dandy") and SpellBinders die "Ribbon Tags Trio". The tag was airbrushed with Copic markers. I also used some Metallic Mixatives (gold) with the alcohol inks.

Be sure to mark (get it?) your calendars for next week's blog hop with
the Mark's Finest Papers team for some awesome new
sets and some awesome samples and prizes!

Please comment and let me know what you think?


Wednesday, December 22, 2010

Ripped Scenes


This card was done by ripping paper!

I stamped the scenic image (unknown) on 3 different 
colors of cardstock.  The outer color of
olive green is the bottom layer which I 
attached first.
The blue layer is above the olive and that layer
was torn along the outside edges and laid
on top of the olive...matching the scene.
The dark green layer is the top one and this
was torn a little more so the other
colors show.  All were attached matching the ink lines.

Here is another sample with stamps by
Magenta and Non Sequitur


*TIP*
When ripping your paper be sure to rip downward so the 
stamped image remains intact to be continued onto
your other papers.  You do not want
to rip the edges up as that will also remove
your stamping.

In this case the colored paper becomes your coloring "tool"